Initial Layer Height and Build Plate Adhesion

Problem

Build plate adhesion was not consistent from print to print. Sometimes the prints would be impossible to get off the bed and other times the plastic would peal off the bed half way through a print. The Duplicator i3 Mini doesn’t have auto bed leveling which made the process time consuming. After some investigation, it was clear there was setting with the biggest impact on build plate adhesion from print to print.

Solution

It turns out that adjustments to the initial layer height require adjustments to the bed leveling on the Duplicator i3 Mini. The initial layer height is the height of the first layer printed. On the i3 Mini, the optimal distance from the nozzle to the bed is slightly different depending on the initial layer height. Keeping the initial layer height the same from print to print greatly reduced issues with build plate adhesion.

Initial Layer Height Setting

For the i3 Mini, setting the layer height at 0.3mm seemed to have the best results. A friend of mine with the Monoprice MP Select said that keeping the initial layer height consistent helped his prints as well. This is likely a larger issue on lower end printers that don’t have auto leveling built in.

Check out my post on 3D Printer Bed Leveling for more tips and tricks to help with build plate adhesion.

Duplicator i3 Mini Add-ons

There are three add-ons that have improved the ease of use and quality of prints on my PowerSpec branded Wanhao Duplicator i3 Mini. The first is setting up OctoPi. My second upgrade was a filament guide that helps protect the printer. Lastly, the bed stabilizers make prints more reliable.

OctoPi

The Pi Zero W isn’t recommended if you’re planning to do any time-lapse photos, streaming or other bandwidth heavy tasks. You’ll need the Pi 3B for that.

Raspberry Pi Zero W

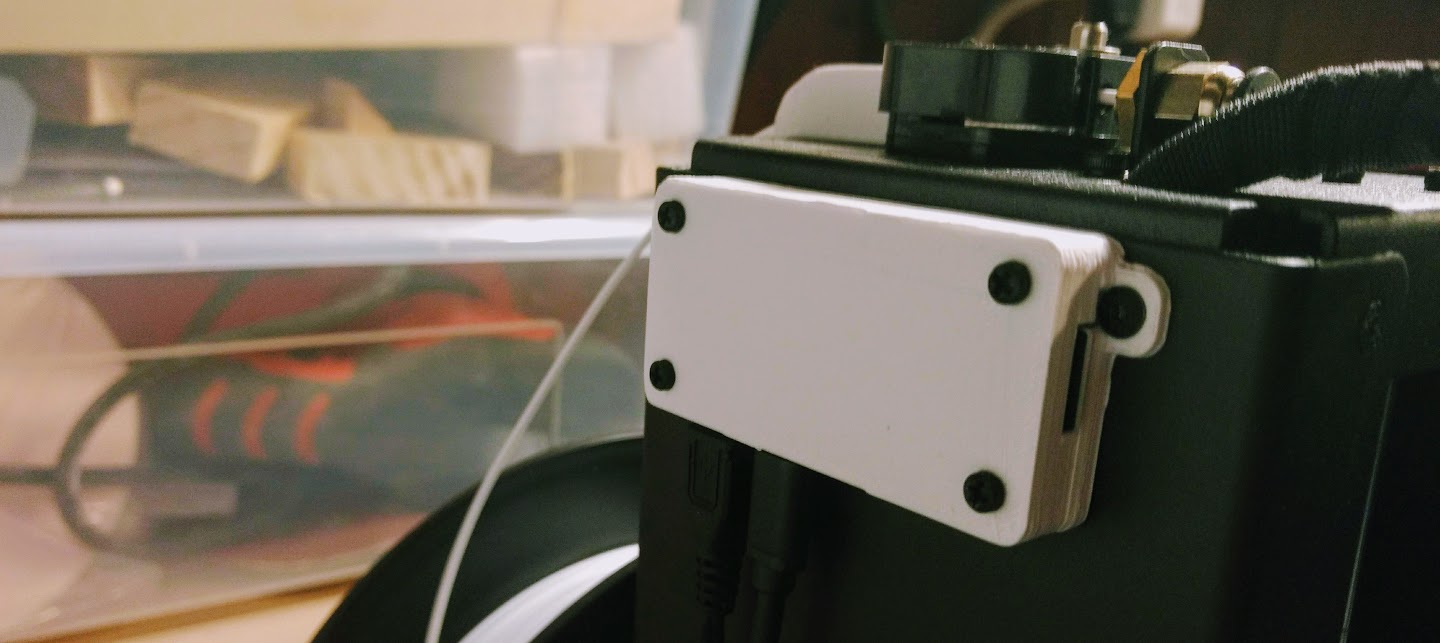
OctoPi allows you to send gcode files to the printer wirelessly. If you’re on a budget and don’t need time-lapse photos, the Pi Zero W works to send prints wirelessly. You must be on the same wifi as the Raspberry Pi for this to work. You won’t be able to access OctoPi remotely without additional setup.

– Raspberry Pi Zero W link ($10)
– Power Cable link ($7.95)
– Micro Usb to USB adapter link ($6.85)
– 16GB micro sd card link ($7.49)
– USB cable (use the cable provided with the printer)
– Mount link
– Four M2.5 or M3 10mm Screws

pi zero w enclosure

Pi 3B Mount

If you’re planning to hook up a web camera to monitor progress or take-time lapse photos, you’ll need the Pi 3B or better.This enclosure mount can be used with a 3B.

Filament Guide

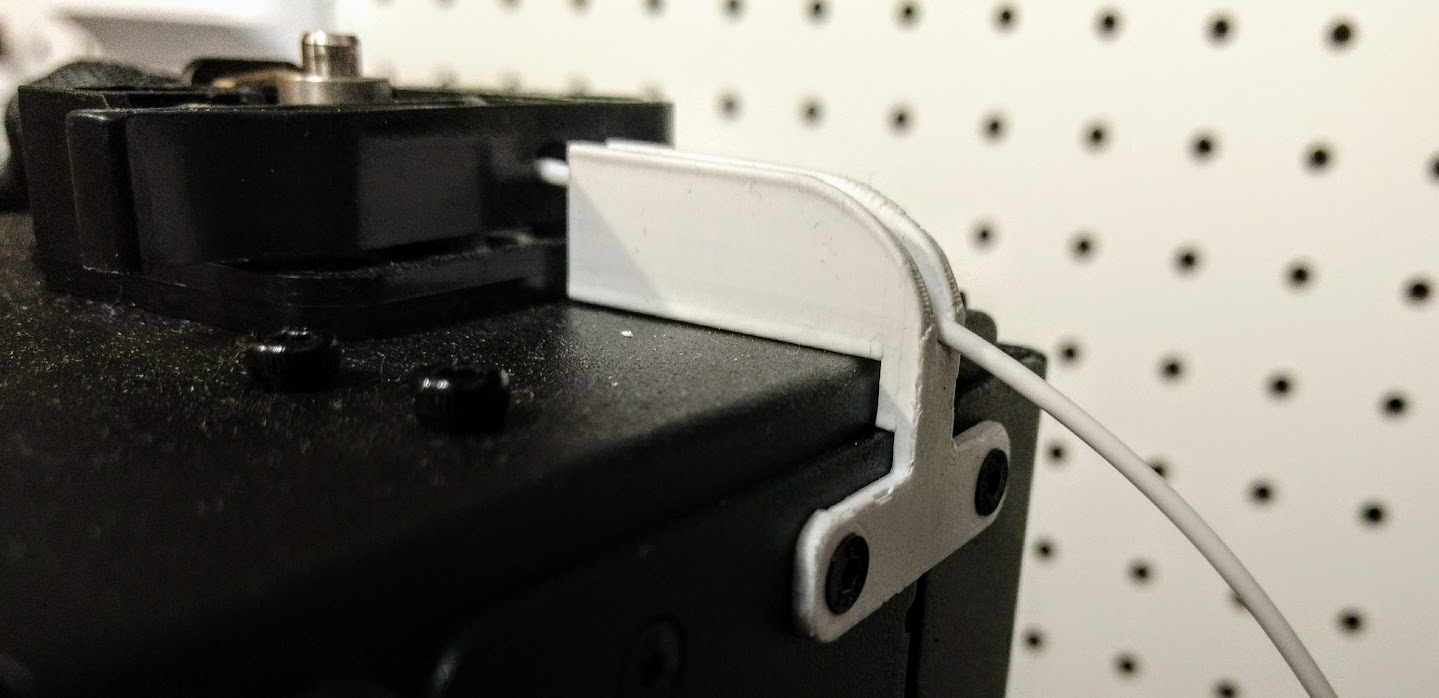
The filament will quickly scratch the surface of your printer as it drags along the edge. This filament guide can be installed using the existing screws and will help protect the exterior of your printer.

filament guide

Bed Stabilizers

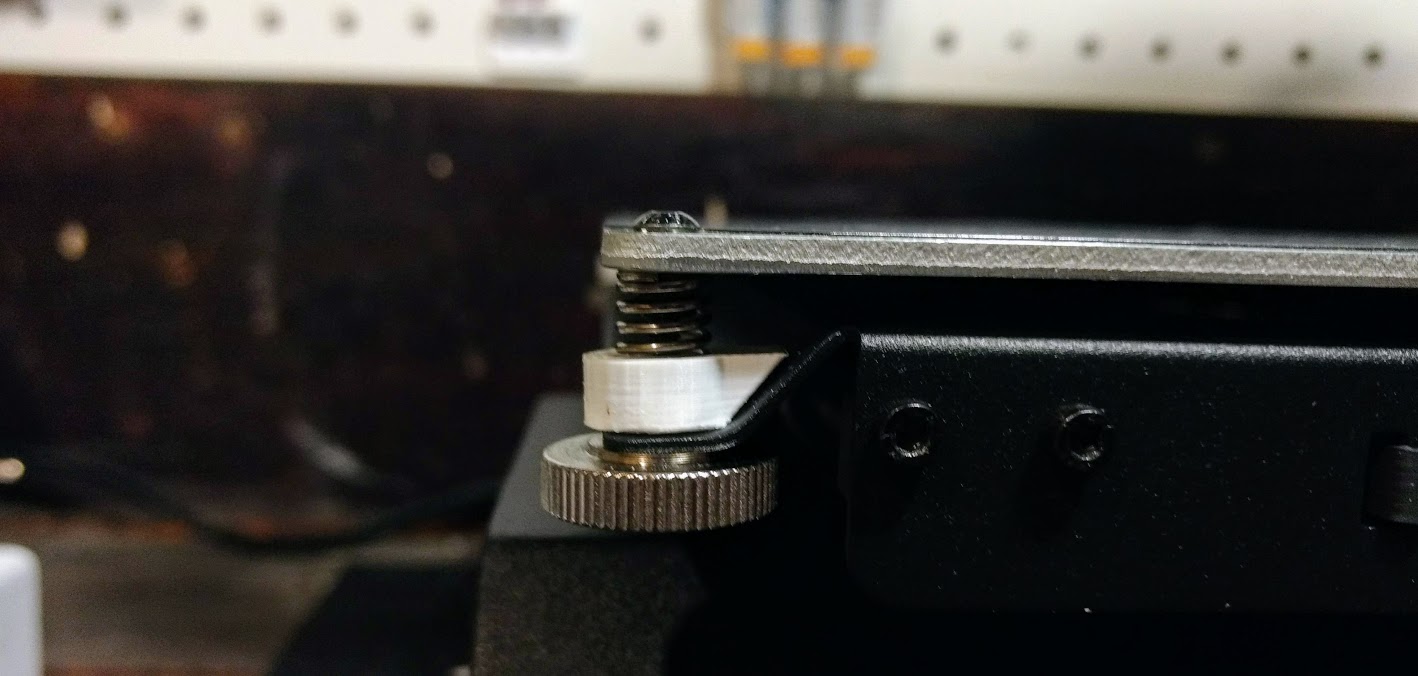
The bed of the i3 mini is prone to minor shifts during the printing process leaving lines in your prints. I noticed this more at higher speeds than lower speeds. Adding these bed stabilizers will help prevent the bed from shifting during a print. You will need to re-level the bed after adding these.

bed stabilizer

Next Steps

The next mod that I plan to do to my printer is adding a fan duct.

3D Printer Bed Leveling: Duplicator i3 Mini

Being new to 3D printing, I felt like the instructions relating to bed leveling were very vague. My first few prints did not stick to the bed and when I finally got my prints to adhere, the edges would peel up half way into the print. After some troubleshooting, my prints are now adhering to the bed without any issues.

Disclaimer: Each 3D printer is a little bit different. Even printers of the same model my behave differently. The following steps helped me but won’t necessarily help everyone. Read your printers provided instruction manual and get familiar with your printer before making any adjustments. Monitor your print after making adjustments to ensure everything is working as expected. Incorrect adjustments can cause damage to your printer. Make adjustments at your own risk.

PowerSpec Duplicator i3 Mini

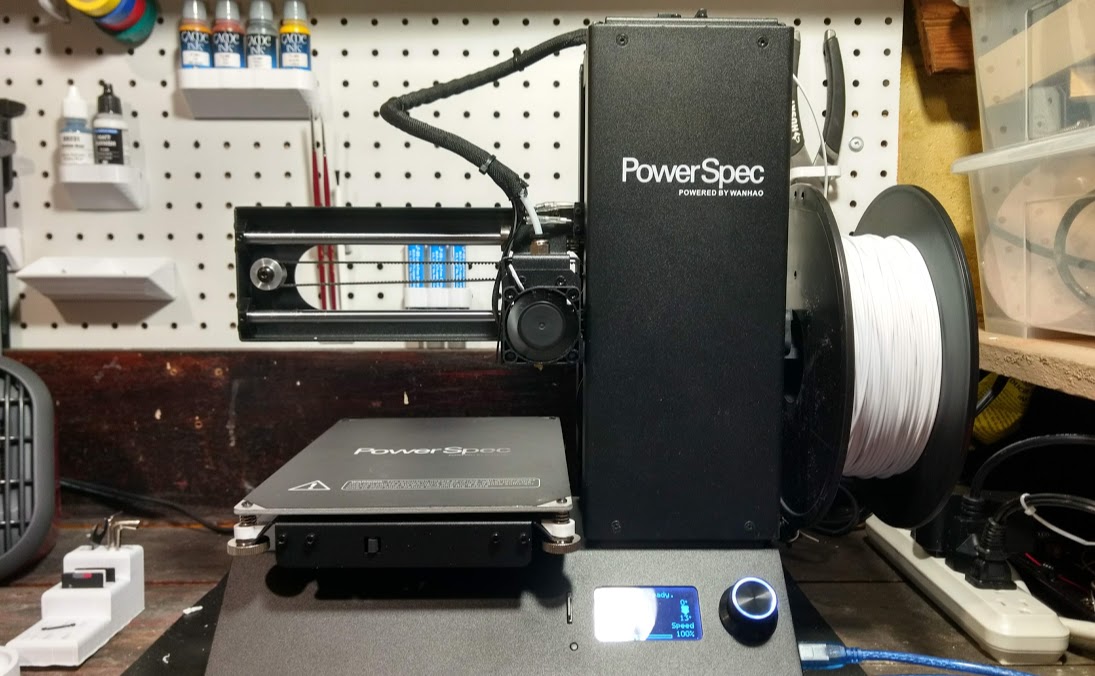
The printer I’m using is the PowerSpec branded Wanhao Duplicator i3 Mini. It came fully assembled but has required a number of adjustments to get everything working.

PowerSpec i3 Mini

Bed Leveling

The instructions said to use the provided bed leveling gauge when going to through the bed leveling wizard. After doing this a number of times to get it just right, my prints were not sticking to the bed. The filament would lift off almost immediately. It was clear there was no adhesion to the plate. I went through the bed leveling again, this time making it so that I could barely get the gauge under the nozzle. This worked better but I still got some edges peeling up after a couple of layers were printed.

Solution

The solution that worked for me was to make a number of minor adjustments. First, slow down the brim speed to 10 mm / s. You can do this by enabling the advanced settings in Cura. Second, increase the temperature of the initial layer. My filament has a maximum temperature of 225 degrees C and I set the initial layer temperature at 220 degrees C. All other layers, I’ve been using 214 degrees C. Third, add a brim to all prints. This helps with adhesion. I’ve been using between 4 mm and 10 mm of brim. Lastly, use a standard 8.5 by 11 sheet of paper to level the bed instead of the provided gauge. Complete the bed leveling process multiple times and make sure there isn’t any filament on the tip of the nozzle when you do the leveling. After making sure there was no residue on the nozzle, I completed the bed leveling process with a cold nozzle.

After completing the above steps, I’ve had adhesion on all of my prints. Some resources online have suggested masking tape or glue sticks but I haven’t needed to use either of those. At one point my nozzle was a little bit too close to the bed and my brim was semi-transparent (using white filament). It was very difficult to get the print off. Leveling the bed again resolved this.

Summary

  • Slow the brim print speed to 10 mm / s
  • Increase the initial layer temperature closer to your filament max temp
  • Include a brim width of 6 mm to 10 mm
  • Use a sheet of standard printer paper for leveling instead of the provided gauge
  • Keep overall print speed at 50 mm / s or slower
  • Keep initial layer print speed at 25 mm / s or slower

Bed Leveling Gauge

Next Steps

The advanced settings in Cura make a huge difference in the quality of prints. Slowing the initial layer print speed and overall print speed have had a big impact on the quality and success of my prints. In a future post, I plan to provide details on which settings have worked well for various types of prints.

App Shortcuts API for Android

Provide quick access to the most used features of your app using the new App Shortcuts API for Android. Unlike many features found in the support library, this API is only available for devices running Android 7.1+ and will not appear on older devices. The good news is that shortcuts are quick to implement and users with compatible devices will appreciate the time savings. You can even pin shortcuts to the home screen making them even easier to use.
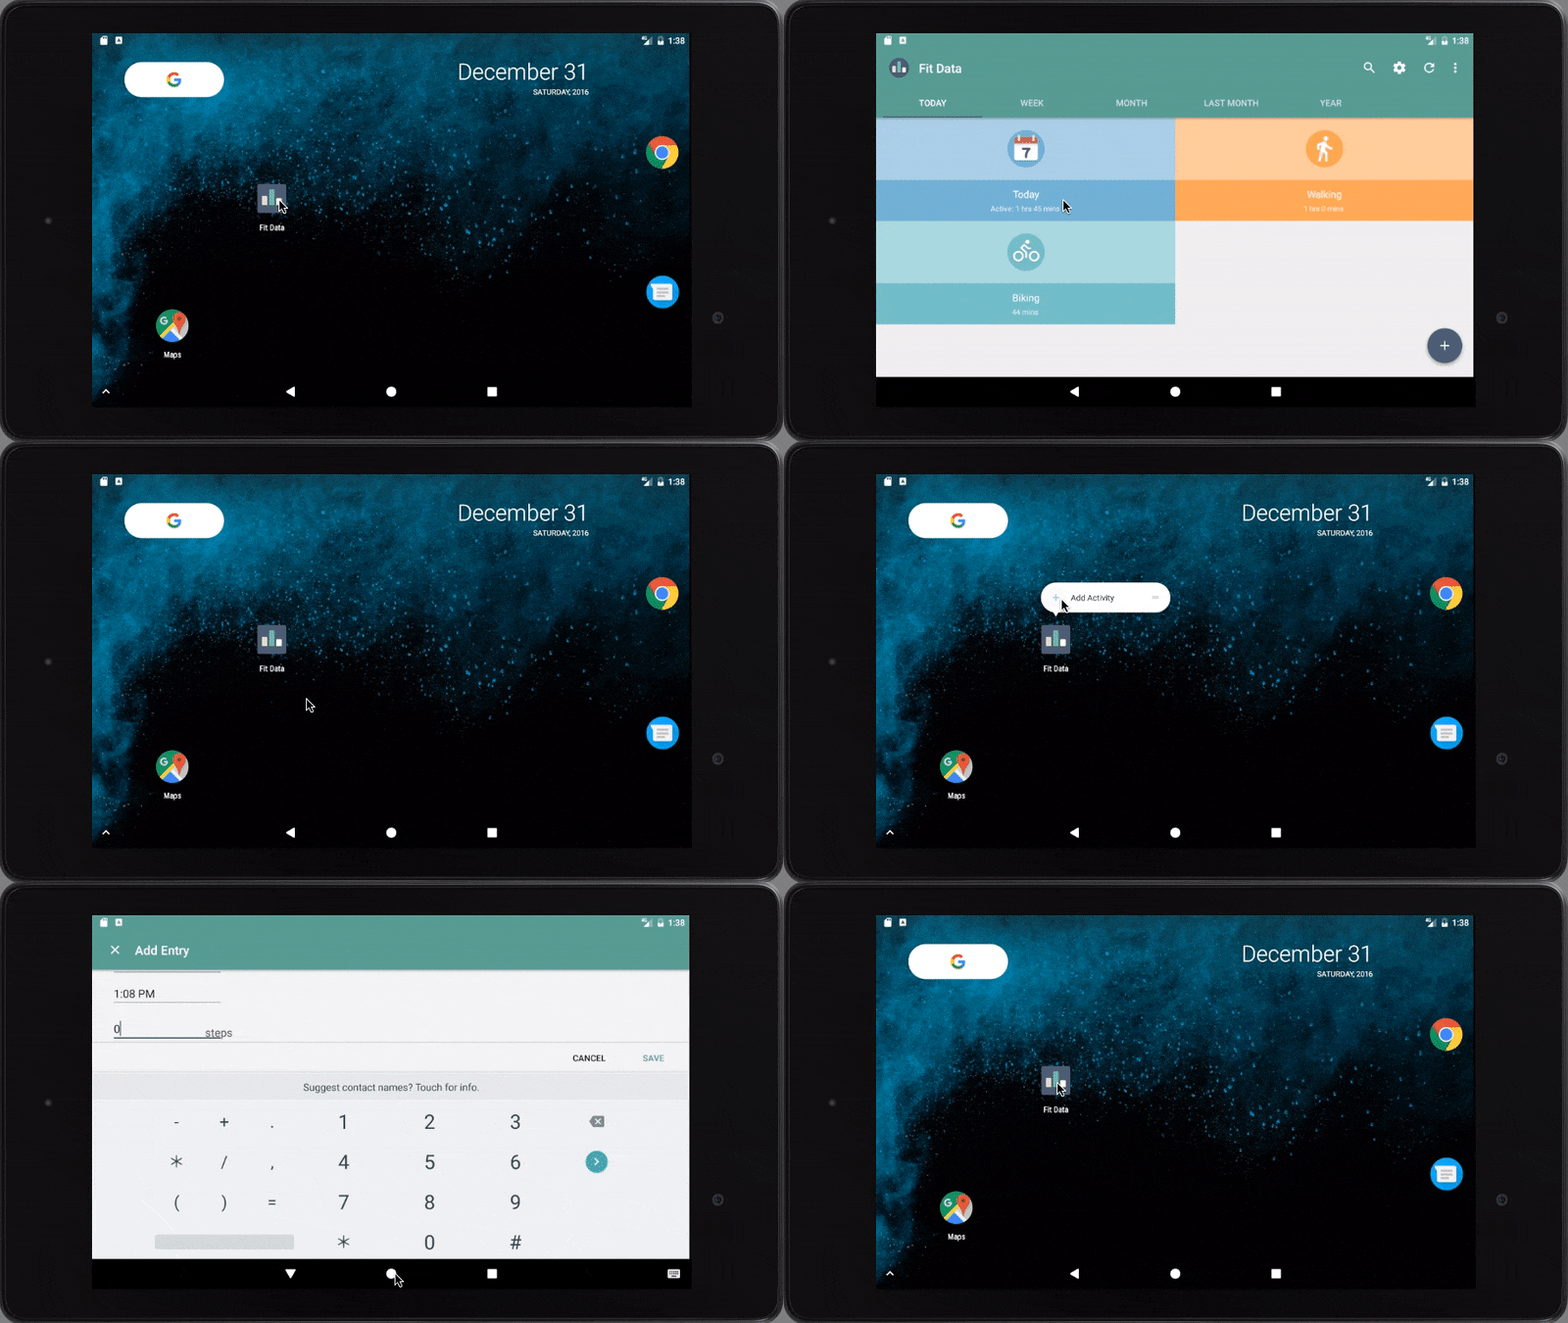
Shortcut API animation

Add a Static Shortcut

Step 1: Target Android API 25+

In order to test this feature out, you must be targeting API 25+ and running an emulator or device with Android 7.1 or higher.

Step 2: Update Your AndroidManifest.xml

Add the path to your XML definition for your shortcuts in your main activity.

<activity
    android:name="com.blackcj.fitdata.activity.MainActivity"
    android:label="@string/app_name">
    <intent-filter>
        <action android:name="android.intent.action.MAIN" />
        <category android:name="android.intent.category.LAUNCHER" />
    </intent-filter>
    <!-- App Shortcuts -->
    <meta-data android:name="android.app.shortcuts" android:resource="@xml/shortcuts" />
</activity>

Step 3: Create Your shorcuts.xml File

Add a resource folder for XML that targets API 25+ (xml-v25) inside your res folder. Add the corresponding label and icon files to your project. Update the package name to match your project.

<?xml version="1.0" encoding="utf-8"?>
<shortcuts xmlns:android="http://schemas.android.com/apk/res/android" >
    <shortcut
        android:shortcutId="add_activity"
        android:icon="@drawable/add"
        android:enabled="true"
        android:shortcutShortLabel="@string/add_new_activity_short"
        android:shortcutLongLabel="@string/add_new_activity"
        >
        <intent
            android:action="com.blackcj.fitdata.ADD_ACTIVITY"
            android:targetPackage="com.blackcj.fitdata"
            android:targetClass="com.blackcj.fitdata.activity.MainActivity"
            />
    </shortcut>
</shortcuts>

Step 4: Update Your Main Activity

Check the intent in the onCreate function of your Main Activity. If it matches the intent of the shortcut, navigate to the corresponding area within your application.

public static final String ACTION_ADD_ACTIVITY = "com.blackcj.fitdata.ADD_ACTIVITY";

@Override
protected void onCreate(Bundle savedInstanceState) {
    super.onCreate(savedInstanceState);

    ...

    if (ACTION_ADD_ACTIVITY.equals(getIntent().getAction())) {
        // Invoked via the manifest shortcut.
        AddEntryActivity.launch(MainActivity.this, 3);
    }
}

Summary:

This is a great new feature but will take time from both an OS adoption and user education perspective. If you’re running Android 7.1+ and app shortcuts don’t appear, make sure your default launcher supports this feature. In addition to static shortcuts, you can also create dynamic user selectable shortcuts using the ShortcutManager.

Additional Resources:

https://developer.android.com/guide/topics/ui/shortcuts.html